 |
 |
Being kids, and more specifically, kids who aren’t being taught much about creative thinking in school, they favor either imitation or pure improvisation. Both of these are essential steps in getting started when first experimenting with engineering and creating visuals. Acting on instinct alone can yield some really interesting results.
To give that push, I decided to test out some design specific activies. This week I tried out the first of several lesson plans on thinking through the design process. I’ll be reporting back with the results of each of these lesson plans as I implement them.
Design, when done right, uses methodology akin to the scientific method to analyze a situation/problem/idea, then solves the identified problem using a systematic process that considers all of its human aspects. While not every student has an aptitude for the visual, a design based process can help them accomplish whatever their interest is. For these reasons, it is important to learn design methodologies, right along with creative thinking.
You can think about connecting the learning of creative thinking and the design process in this way:
Step 2) Become aware of process. Learn to move through a structured process that will allow you to channel your creativity into successful projects.
You can see the full lesson plan here. This is an abbreviated version of what we did.
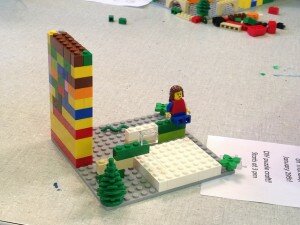
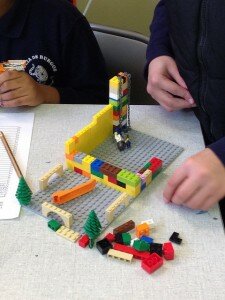
I introduced a modular material. We happen to have legos, but you can also use blocks or something similar. Participants should all be on the same playing field, regardless of their experience with a material, their dexterity, or their knowledge of construction techniques. The goal is for students to focus on ideas, not materials. I then presented a building challenge to the students. For this session it was making a park, an idea that the first participant to join us had.
Before participants started, I brought their attention to an object in the room. (I used both a pencil and lollipop.) I talked about the size, shape, and material of the object, and the object’s functionality. The participants then got started making. At the end of the session each student discussed what they made, and explain why they built it the way they did. Other participants could discuss the work and give constructive feedback.

Like every program we do at Maker Jawn, the session was unpredictable.
We started off by explaining the activity to our first participant, and asking him what he thought we should make. He suggested a park, which I thought was a great idea. A park is so flexible and can function in many different ways for different people. He then expressed concern about everyone having to make the same thing. He thought that everyone should be able to make their own decision about what to make. It was great that he challenged the instructions, and questioned whether it was the right thing to do. We had an interesting talk, where I tried to explain why it was important for everyone to make the same thing for this particular activity. I also explained that even though everyone would be making a park, they could put absolutely anything in the “park” that they wanted. Total park freedom!
One of my favorite things about this exercise was being able to talk to each participant about what design meant. I would pick up an object like a lollipop or a pencil and have a conversation about how someone designed the object, packaging, etc. I would point out different parts of the object and we talked about why it was shaped the way it was, or why the parts were connected the way they were. Most of the kids were surprisingly receptive, and willing to talk it out with me.
Another important element of the exercise was discussing the park designs as a group after they were complete. We had a critique, under the guise of a “contest”, where each participant talked about what they made and why. I asked them questions about the design, and others were allowed to comment on the work. The rule was that no one could say something was “stupid” or “ugly” and they had to back any opinions they expressed with the reasoning behind their thought.
The exercise was also a really great way to highlight the different learning styles of each participant. Applying some constraints allowed me to see the way they broke out of those constraints or worked around them. It also gave me better picture of what roles I could encourage people to take on for a collaborative project.
One participant started building, but almost immediately went into narrative mode. He was interested in actively creating story, and specifically story centered around character. He tends to go to fantastical places with his narratives, but I think maybe that could be channeled into thinking about what would be called the “user profile”. He would be thinking through how someone would use the designed object or system, by crating narrative.
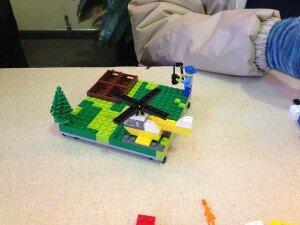
Another participant was really interested and focused on following the instructions included in the lego set, and diligently built a helicopter and car. She then integrated these elements into her park design. She would likely be more interested in the technical and physical aspects of building an object or prototype.
